Category Archives: How To

What Is the Proper Spooling of Spinning and Baitcasting Reels?

Kentucky Afield Outdoors: Proper spooling of spinning and baitcasting reels
from The Fishing Wire

FRANKFORT, Ky. – A family member bought you a nice spinning outfit for Christmas. Despite the cold, your desire to cast the new rod into water propels you to a local Fishing in Neighborhoods (FINs) lake to try to fool some winter rainbow trout.

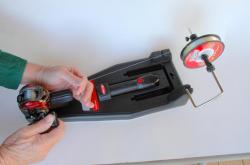
Spooling Tool

Spooling Tool

A respooler like this one from Berkley makes line winding quick and trouble-free, but home systems, including a spool on a pencil, will also work with care.

Dutifully spooling on some fresh 4-pound test monofilament, you cast a red and silver in-line spinner a few times. As you move to a new spot and shoot a cast, you hear a sound similar to a flushing covey of quail and see a ball of spaghetti moving up the rod.

You now have a bird’s nest of epic proportions, requiring cutting off the mess, pulling out the loops and retying the lure. You curse the brand of line you bought.

In all likelihood, it isn’t the line’s fault. Properly loading fishing line onto a spinning or baitcasting reel is a skill many anglers take for granted, but often do incorrectly, greatly reducing the line’s performance. Incorrect line loading often causes tremendous line twist, the main culprit behind bird’s nests.

For spinning reels, first make sure the line you’ve selected matches the capacities of the reel. These capacities are always labeled on the side of the reel’s spool. Don’t load 10-pound test line onto a reel designed to accept lines from 2- to 6-pound test.

Begin by placing the filler spool onto a table or floor with the label facing up. Run the tag end of the line through the stripper guide – the largest guide closest to the reel – and to the reel. Open the reel’s bail and wrap the line twice around the middle of the reel spool, tie an overhand knot and tighten. Follow up with another overhand knot and clip the line about ¼-inch from the knot. Make sure to clip the tag line, not the main line leading back to the filler spool.

Reel some line onto the spool and stop. Lower the rod toward the filler spool. If the line begins to jump and twist, flip the filler spool over, placing the label down. Sometimes, the direction the line was spun on the filler spool at the factory and the direction the spinning reel places line on the spool are not in synchronization, which causes enormous line twist. Flipping the filler spool alleviates this problem.

If the line comes off the spool in big loose coils and doesn’t twist, keep reeling until you fill the spool to the thickness of a nickel from the spool lip.

Another way to load the spool involves a helper. Have the helper run a wooden pencil through the hole provided in the center of the filler spool housing. Run the line through the stripper guide and tie on to the reel spool. Ask the helper to hold the spool and pencil assembly perpendicular to the reel, similar to the way a wheel rotates on an axle, and apply gentle pressure to the filler spool with their fingers.

The line must come off the top of the filler spool toward the reel, not the bottom, or it incurs line twist.

Resist the temptation to overfill a spinning reel’s spool. If you’ve ever opened the bail on a spinning reel and line shot off it like a top, then you’ve witnessed the results of overfilling the spool. You can lose half a spool of line from twists, tangles and bird’s nests from overfilling a spinning reel.

Choices of Line

Choices of Line

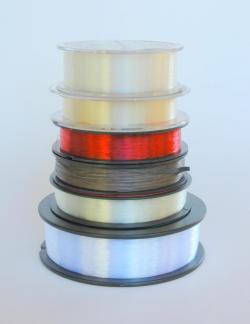
There are lots of options in refilling a spool-just choose a line suited to the task, and respool frequently; good line is critical when the big one bites.

Manually closing the bail of a spinning reel with your hand after making a cast is one of the best ways to keep line twist at bay while fishing. Each time you close the bail by turning the reel handle, you apply twist to the line. Over a day of fishing, these twists add up and produce loops and tangles that eventually lead to a mess. After a few fishing trips, manually closing the bail becomes second nature.

To fill baitcasting reels, run the line from the filler spool through the guide closest to the reel and through the line guide of the baitcasting reel to the spool. You can simply run the line through the holes in the ported spools found on most baitcasting reels today and start reeling. Or, secure the line to the spool with an arbor knot. Both techniques work.

The pencil through spool with a helper technique works best on baitcasting reels. Again, make sure the line comes off the top of the filler spool, not the bottom. You can also do it by yourself by placing the filler spool on a table with the label up and checking for twist, but the pencil through the spool method works much better for baitcasters.

Fill the spool to within a 1/16-inch of the rim and, again, resist the impulse to overfill the reel.

Don’t let line problems stemming from improper loading ruin a day of fishing. Following these simple procedures will achieve the best casting distance for your spinning and baitcasting reels, keep tangles at bay, and extend the life of your line.

Author Lee McClellan is a nationally award-winning associate editor for Kentucky Afield magazine, the official publication of the Kentucky Department of Fish and Wildlife Resources. He is a life-long hunter and angler, with a passion for smallmouth bass fishing.

How Can I Stay Warm While Ice Fishing?

Keep Warm On The Ice

by Bob Jensen
from The Fishing Wire

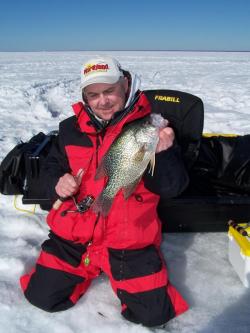
Ice Crappie

Ice Crappie

If you dress for the conditions when you’re on the ice you’ll enjoy ice-fishing even more, and you’ll also be more successful at catching fish through the ice.

It got cold again! That’s good and that’s bad. It’s good, because the ice is getting thicker and safer across most of the ice-fishing region. That means more anglers will be on the ice in the near future.

It also means that it’s easier for those ice-anglers to get cold, and usually getting cold is not a fun part of ice-fishing. However, it’s not necessary to get cold when you’re ice-fishing or doing anything outdoors this time of year. There is so much outstanding and affordable clothing that there really is no need to get cold outside unless you’re in unusually extreme cold. Here are some ideas for staying warm on the ice.

Remember, if you get too warm, you’re going to get cold. If you’re drilling a lot of holes in the ice, or walking from hole to hole a lot, you’re going to get warm. When we get warm, we sweat, and if that sweat gets trapped next to your skin, you will eventually get cold. We want to be wearing under-garments that will wick the sweat away from your body. Garments made from cotton are not the answer: Cotton traps the sweat. Cabela’s MTP and Polartec base layers are a great place to start.

My next layer is usually a hooded sweatshirt, and I then slip into water resistant bibs. I prefer the bib style because it offers more protection from the wind to areas that could be exposed, and I like the water resistant feature because there are times when I kneel next to the hole to land a fish. The water resistant feature keeps me dry, and therefore warmer and more comfortable.

Next goes on the outer layer: I like parka length because, again, it provides more protection to areas of skin that could be exposed to the elements. My favorite is Guidewear for both the bibs and parka. In fact, the same Guidewear that I keep in the boat for summer fishing works great for ice-fishing.

Round this out with a cap and boots. Wear a stocking cap or something of that nature. Heat escapes from an uncovered head. Set up your fishing position so your back is to the wind, and pull your hood up over your cap. If you’re facing into the wind and you pull your hood up, you get a swirling effect, and that can be not-so-pleasant.

If your feet get cold, you’re going to be cold and uncomfortable. Boots can be a personal thing: Some folks like big “pac” insulated boots that are very warm, but can also be heavy. They’re great for keeping warm, but they make walking around a lot of work.

There are lots of lighter weight boots available that do a great job of keeping your feet warm if you keep moving–several layers of wool socks can help a lot, but be sure to size your boots big enough that the layers don’t cramp your toes–cramped toes are cold toes.

And then, probably the best way to keep warm on the ice is to fish from a permanent shelter that has a heater inside. This year I’m spending quite a bit of time in an Ice Castle house. It’s warm, it’s comfortable, and it’s also very easy to move to follow the bite. Now, that’s really the way to go ice fishing.

To see the newest episodes of Fishing the Midwest television go to fishingthemidwest.com. Visit us at Facebook.com/fishingthemidwest

What Are Some Kayak Fishing Basics?

Kayaking Basics from Florida’s FWCC
from The Fishing Wire

Fishing from a kayak

Fishing from a kayak

Thinking of buying yourself a ‘yak for Christmas? Here are some of the points you might consider.

Last year my wife and I finally got a pair of kayaks. I’d had a chance to paddle a friend’s kayak once or twice before, but never had a kayak of my own to spend some serious time with. Even after a couple decades of small-craft boating, I was quite impressed with the portability and versatility of these craft. Here’s some of what I’ve learned in the past year.

Cost: If you’ve been thinking of taking the plunge with a kayak, there’s never been a better time. Kayaks have become very popular in recent years, meaning that more manufacturers are making them and prices for an entry-level kayak are even lower than they used to be. Standard kayak models start at a low of about $200 on sale, but you’ll want to spend more for a fishing kayak that comes complete with rod holders and other angling amenities-expect to pay from $250 on up on sale. You’ll also be buying a double-bladed kayak paddle, which will run you $50-100 or more. Most kayaks don’t include a padded seat, and you’ll probably want one; add another $50-75. Yes, the tab is adding up pretty quickly, but you’re still well under what the cheapest johnboat and trolling motor will cost you. Smaller accessories, such as a light anchor and-of course!-a life vest, you may own if you’re already a boater.

A kayak is a very personal purchase, and you should buy from a vendor that will allow an exchange if you don’t like the way the craft fits you or how it performs in the water. Otherwise, some kayak shops are near water and will let you try before you buy. Keep in mind that you’ll need a way to transport your kayak, if you can’t just throw your new purchase in the pickup and head for the lake. A good roof rack setup or trailer will cost you more than your kayak will, but a kayak is still one of the most economical boating options out there. (See Issue 45 at www.bit.ly/FFAngler for more information about roof racks.)

Sit-on-top versus sit-inside: There are two basic kayak types. A sit-on-top kayak is a sealed hollow shell with molded seating on top to accommodate the paddler. It’s easy to get in or out of, a major plus if you plan to kayak-and-wade. The kayaker sits above the waterline, which increases visibility and casting distance, but leaves the kayaker exposed to waves and splashing. Storage space is mostly open to the elements, but is easily accessible. However, there will probably also be one or two watertight hatches that allow dry storage inside the kayak shell. Note the size and location of the hatch openings, as these will limit what you’ll be able to fit inside and whether you’ll be able to reach them from the kayak seat. Water that splashes into the kayak drains out through scupper holes, which can be plugged to prevent water ingress, if you’ll be on calm water.

A sit-inside kayak is self-descriptive: the paddler sits inside a cutout in the open hull. Add an apron, and the paddler is pretty well protected below the waist from waves and water. The angler is sitting at the waterline, and the lower center of gravity may provide a more stable ride but slightly limited visibility and casting distance. The open hull provides plenty of fairly dry inside storage in front of and behind the kayaker. However, this internal storage is not as easily accessible, and entering and exiting the kayak is not nearly as easy. Generally, the sit-inside design is a good choice for river or ocean kayaking but will also serve in quieter ponds and lakes. However, many stillwater anglers prefer the in-and-out convenience offered by the sit-on-top design.

Fishing kayaks: The simplest thing that defines a “fishing kayak” is the presence of rod holders. A fishing kayak will also usually be wider than standard kayaks-around 30″ or so-and therefore more stable. It may have extra storage features, like molded in tackle trays or even a baitwell. Note that you can add after-market rod holders to most kayaks, but you’re better off starting with a fishing kayak, mainly for the added stability. A wider kayak won’t cut through the water as quickly as a standard model, but you’ll be able to cast, set the hook, and land frisky fish without feeling like you’re about to take a spill at any moment. I was really surprised at how stable my kayak is-definitely less tippy than most canoes I’ve used.

Length: Length is important. A longer kayak will travel faster and more efficiently (and have more storage space), but weigh more to load and carry-especially important if you’re cartopping or portaging. Twelve to thirteen feet is a popular range for saltwater anglers, and will provide a roomy and stable freshwater fishing platform too. However, if portability is important, look hard at kayaks ten feet or less in length. My ten-footer is a lightweight at exactly fifty pounds, but I’d still swear it’s half full of water when I hoist it back onto my roof racks at the end of a long paddling day. The weight is much easier to handle if you’re securing your craft to something below shoulder level, like a pickup bed or trailer. A kayak cart can also be a big help moving your boat from car to water (more on that later). Long story short, consider weight an important factor based on how you’re transporting your kayak.

Paddles: Kayak paddles are double bladed, unlike rowboat oars or canoe paddles. This makes the kayak an extremely efficient craft, because you propel it with both the forward and what otherwise would be the “back” stroke. Paddles come in specific shaft lengths, which you choose based on the width of your kayak and your height. The wider your kayak and the taller you are, the longer paddle shaft you will need. Kayak and paddle manufacturers provide tables for making your best choice. Paddle blades also vary. A long narrow blade works well for propelling a kayak nonstop over long distances, while a short broad blade works well for tight maneuvering along brushy shorelines and the stop-and-go travel a kayak angler will likely be making. In Florida’s lakes and ponds, most anglers should stick with a broad blade. As a side note, be aware that some fishing kayaks are equipped with various ingenious pedal-and-propellor systems that make propulsion a lot easier and leave your hands free for fishing. These are nice, but significantly more expensive, and are generally restricted to longer kayaks. Some kayaks can be outfitted with a trolling motor; note that you will have to register the kayak if you go this route, and will need room for a 12-volt battery.

Accessories: Your number one accessory is your life vest, or PFD (personal flotation device). I prefer an inflatable PFD for its coolness and light weight, although many kayakers will tell you that you’re going to tip over (and activate the CO2 cylinder) sooner or later. Your risk is less in stillwater ponds and lakes; however, I’m willing to live with that possibility, especially during the summer heat. Make sure you are also complying with all other boating safety requirements (MyFWC.com/boating/safety-education). Another “must have” accessory will be a dry storage bag for keeping your phone, electronic car keys, camera and other sensitive gear safe from the elements.

If you are going to have to carry your kayak any distance between your parking spot and the water, consider buying a wheeled kayak carrier. These handy little carts strap onto the bottom of your kayak, allowing you to roll your craft to the water. An advantage of these is that you can load all your equipment into the kayak as well and make a single quick trip, rather than going back and forth to your vehicle for paddle, anchor, rods, etc. or having to try to carry them all at once. Strapping the wheels in place near the kayak’s center of gravity will provide a balanced and effortless walk to the water’s edge. Some kayak manufacturers offer carts that will fit right into their kayaks’ scupper holes, eliminating the need for straps.

One of the (few) annoying things about fishing from a lightweight kayak is that it is easily pushed around by wind or waves, so you’ll want a lightweight folding anchor to help you stay put. An anchor works best in deeper water or when you’ll be staying put for a little while, such as when fishing bait. If you use the anchor a lot, you’ll want an anchor trolley that allows you to position the anchor line fore or aft, depending on wind or current and how you want to position your craft. For frequent moving and anchoring-which I’ve found to be the norm for lure fishing-a stakeout pole is much more convenient. This is simply a pole pushed into the lake bottom to anchor the kayak. The pole can be inserted through a scupper hole, or attached to the kayak with a short rope and snap clip. Many anglers prefer a stakeout pole over an anchor, because there’s less chance of tangling with a scrappy fish. You can buy a commercial stakeout pole, or make your own out of PVC pipe or any other sturdy pole such as an old golf club with the head removed. Use is obviously limited to fairly shallow water, depending on the length of the stakeout pole.

There’s a host of other accessories available: extra or specialized rod holders, rod and paddle tethers, depth finder and camera mounts, special kayak tackle holders, baitwells, and more. Kayakers (and kayak manufacturers) seem to be a particularly inventive lot! Customizing your kayak for your comfort and specific fishing needs can not only put more fish in the boat, but also be a satisfying end in itself.

Care and feeding: One of the great things about kayaks (especially if you’ve ever scrubbed down a large boat after a saltwater fishing trip) is that they require almost no maintenance. Just hose your kayak off after a muddy or saltwater fishing trip, stow it out of direct sunlight, and that’s about it! With minimal care, a kayak will last for years.

Fishing from a kayak: Okay-you already know how to fish. But fishing from a kayak is different, even from fishing in a small canoe or johnboat. While fishing kayaks are usually very stable, you must keep your balance in mind at all times-when leaning over to unhook a snagged lure, setting the hook or netting a fish. While fishing kayaks are roomier than their standard-sized brethren, space is still at a premium. Many of your kayak customizations, if you make any, will probably involve gear storage. I don’t like much in my way while kayak fishing, and keep minimal gear (like hooks, plastic worms, and pliers) in a small tackle box or tackle bag in front of me. The rest of my tackle, plus raingear, sunblock, etc. are in a larger waterproof duffle bag stowed behind my seat. I don’t need to move to release a fish, tie on a new hook, or change out my worm. If I need something more, I can reach back to grab the duffel bag, or hop out in shallow water to grab it. Water or sports drinks-a must for the Florida kayaker-go under the bungee straps in the front or rear of my kayak, depending on the rest of my loadout and available space. My kayak actually has a cup holder right in front of the seat, and a sports drink goes there right away when I launch.

I’ll work a shoreline or deeper water the way I normally would from any small boat. However, since I’m sitting low my casting distance and visibility are more limited, so I sometimes have to work closer. Thankfully, a stealthy kayak is ideal for this. I can often paddle along just casting as I go, but sometimes wind or wave action requires me to anchor my stakeout pole at every stop. A stakeout pole or anchor also help when you hook a bigger fish. You’ll be able to land most fish with ease, but I’ve had hard-fighting fish as small as four pounds take me for a brisk “sleigh ride”. This can actually be fun in open water, but if you’re casting anywhere near docks or submerged brush you’ll want to anchor yourself if you hope to have any control when “the big one” hits. And when he does, a kayak will put you closer to the action than anything else except wading.

The kayak advantage: Besides simply being fun and exciting to fish from, kayaks have one more major advantage: portability. Anywhere you can stand, you can launch. Since getting my kayak, I’ve been amazed at the world of new fishing opportunities that have opened up for me. Some of these new opportunities have turned up at my “old” fishing holes, where I can now launch a boat off a 60-degree canal bank, or where a sliver of public shoreline lets me get into an otherwise-inaccessible lake. I recently fished a narrow canal that would have been too brushy even for a canoe. There’s something eminently satisfying about catching a big fish that you know was out of reach of anyone else-except a fellow kayaker.

For more information: Numerous books specifically on kayak fishing are now available. Online, general information about getting started in kayaking can be found at smart-start-kayaking.com. Numerous videos on everything from getting in and out of your kayak without tipping over to paddling and fishing from it can be found by searching at YouTube.com.

Can I Pinpoint Places On the Ice To Drill Holes for Fishing Based On Surface Irregularities?

Ice Fishing Over the Edge

Surface irregularities serve as a template for pinpoint-hole-drilling during early-ice

By Mitch Eeagan
from The Fishing Wire

Landing a limit of fish through a hole is a lot like running a flourishing retail business – no matter what you’re offering, success ultimately boils down to location, location… location.

Drill the right hole

Drill the right hole

Humminbird’s Master of Flasher, Brian “Bro” Brosdahl identifies irregularities in the ice to choose general drilling zones. “Blemishes” like snow patches and greyed ice provide fish a preferred, built-in sunblock. Photo by Bill Lindner

“Close enough” won’t cut it with fish or commerce. In hardwater angling, the exact position of your hole must often be reduced to mere inches rather than “somewhere within sight.”

With that in mind, enter the guru of ice angling, Brian “Bro” Brosdahl. The Northern-Minnesota-based guide has been successfully taking clients fishing on frozen waterways for decades. And just like you and me, his customers, overall, just want to catch as many fish as they can without having to repack and relocate with any frequency.

On the whole, Bro uses two types of electronics to determine exact places to drop a line – a sonar/GPS combo and an underwater camera. But well before pushing the power button, the Grand Rapids resident identifies areas to cluster those holes by taking a moment to observe his surroundings, noting what the ice-covered surface is telling him.

Look before you leap

Overall, Bro Country, as his turf is termed, is snow country, and later in the season a lake’

Less light under snow island

Less light under snow island

s entire topside will be covered with a thick blanket of snow. This is when modern-day electronics and mapping programs play the roles of their lifetimes.

An obvious snowcapped island provides fish a ceiling of light protection, while at the same time affording anglers underfoot stealth. Photo by Mitch Eeagan

But before the flakes start to accumulate in feet versus inches, Bro aims for areas where the ice has formed differently than its surrounding facade, as well as where small patches of snow have amassed, especially when the ice is clear as a bell.

“There’s a reason the ice has an unusual look to it in different places,” says Bro. “Springs bubbling up from the bottom, a patch of still-green weeds radiating heat from the sun’s rays and even a slight difference in depth are all possibilities. And all will attract fish throughout the season.”

Right off the bat, Bro bores holes along the paths where clear ice butts up to white, heaves protrude from the flatness, cracks have been created and anyplace snow has piled. And when he checks each hole with his Humminbird ICE 688ci HD, sure enough, there’s structure, or better yet, fish below. And in holes not created directly over cover, he confirms the presence of favorable structure and cover with his Aqua-Vu AV Micro 5 underwater viewing system.

“Anywhere light penetration is reduced overhead, even if there is none of the “classic” cover [weeds, wood and rock] nearby, fish will gather,” adds Bro. “Think of it like a swimming platform or dock during the openwater season; here, more often than not, you’ll find fish of all species hanging out in their shadows.

Darkness overhead can be considered “cover”, and it’s where fish congregate, summer and winter.”

The answer is clear

On lakes and reservoirs where little snow has fallen and clear ice covers the majority of the surface, Bro’s initial holes will have a different look and feel about them.

It’s in these holes Bro keeps his power auger running well after its point has protruded from the ice’s underbelly, or when using a hand auger, will lower and lift it quickly it several times so that water is brought up out of the hole and onto the ice. Immediately following, he’ll set up his Frabill flip-over and/or Hub-style shelter over what seems like a sloppy, slippery mess – but there’s a method to Bro’s madness.

“First, the slightly warmer, freshwater from the lake will quickly etch into the slick surface of the clear ice, causing it to cloud and reduce light penetration,” Bro claims. “And the shanty, too, will create a shadow, and the most active fish around will eventually swim over and take shelter under my shelter.” Clever…

Setting up these holes first lets the immediate surroundings calm down while the dedicated guide’s out drilling another swath of holes, setting tip-ups and the like. And by the time everything’s taken care of, he and his clients can quietly converge on the pre-erected shanty and start fishing. “Just keep as quiet as you can,” warns Bro, “and keep your movement to a minimum or you will spook fish.”

Stop. Look. Drill.

Find snow cover to drill your hole

Find snow cover to drill your hole

Hardwater savant, Paul Nelson plugged this victorious hole over a snow-blem on an otherwise clear surface. (Note cleaner ice in the background.) Photo by Bill Lindner

If you’re looking to land a limit of fish early in the ice-fishing season, just remember to stop and take a look around before drilling that first hole. Features seen on the surface of the icescape will often tell you where to start.

Bore your holes where clear ice butts to white, where heaves or cracks have formed, or over snowdrifts that create overhead cover; you’ll stand a better chance of pegging fish than your buddy who doesn’t pay attention.

Mitch Eeagan is an outdoor writer who lives off the land amidst the snow-covered cedar swamps of Michigan’s Upper Peninsula.

What Is Casting for Crappie?

Casting for Crappie
from The Fishing Wire

Casting for crappie

Casting for crappie

When it comes to catching crappie, spider rigging is popular along with long lining. However, just casting for crappie is the number one tactic for many crappie anglers.

As with all fishing, catching crappie by casting requires that you put yourself where the fish are, whether you’re in a $40,000 boat or walking the bank.

For crappie anglers in most areas, the best time to cast for crappie is in the springtime when the fish are up shallow spawning. Crappie will get up on the bank searching for spawning areas and make nests around cover or structure. Making target specific casts to cover and structure is the best way to catch these crappie.

“Casting is a great way to get the bait or lure in front of the fish without spooking them when they’re up shallow,” says B’nM’ crappie pro staffer Brad Taylor.

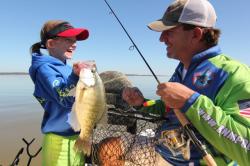
It’s not just Brad Taylor using a spinning rod and reel when casting for crappie. His daughter, Allie Bre, one of his favorite fishing partners, also loves to cast and catch crappie. “It’s a great time to take out your children and let them cast a live minnow or lure by themselves without having to help them and they can honestly catch a fish by themselves,” said Taylor.

One of Taylor’s favorite crappie fishing spots is the renowned Grenada Lake in Mississippi. “Early in the year, I like to fish the grass on Grenada Lake since there is no structure to speak of here. I usually fish with a live minnow or Southern Pro Lit’l Hustler 1 ½-inch tube rigged on a 1/32- or 1/16-ounce jig head,” said Taylor.

For live minnows, Taylor uses a #2 Eagle Claw 214EL light wire hook and #4 split shot. “Since the water is muddy on Grenada Lake, I can rig up with 8 pound test line when fishing with live minnows or even tubes,” said Taylor.

Crappie caught by casting

Crappie caught by casting

Taylor likes to rig with a cork and keep the tube lure just above where the crappie are located.

“Most the time on Grenada, I’m in about three feet of water catching them,” said Taylor.

Casting light offerings can be challenging for the novice angler. However, a spinning reel can help eliminate some of the problems associated with casting especially live minnows or lightweight lures. Spinning reels have a fixed spool that doesn’t rotate. Instead the fishing line flows off the spool by being pulled from the weight of the lure.

One reel especially effective for this duty is the WaveSpin spinning reel (www.wavespinreel.com) with a unique star-shaped spool lip that the company says is much less likely to cause tangles than conventional designs. Reportedly the design can also increase casting distances due to reduced line drag. The revolutionary spool features a row of teeth all slanted in one direction with gaps between the teeth reducing friction at the same time eliminating tangles. The reels have aluminum spools, all metal gears, over-sized line roller, infinite anti-reverse and an exclusive 10 disc drag system.

Two anglers that don’t have any problems casting spinning rods and reels are B’n’M’s pro staff manager Kent Driscoll and B’n’M’ pro staffer/Grenada Lake fishing guide John Harrison (www.crappie101.com) who fish together in crappie tournaments. Both like to cast spinning rods and reels especially to stake beds. Stake beds are man-made structure commonly constructed from wood or PVC pipe to attract crappie.

“When fishing stake beds, we approach them going into the wind because we can control the boat better and that lets us keep our distanced from the stake bed,” said Harrison.

“We use live minnows, live minnows rigged on a jig with a soft plastic body or a 1/16-ounce jig. Normally, we will just cast past the stake bed and twitch it, pause, twitch, pause retrieve back through the stake bed,” said Driscoll.

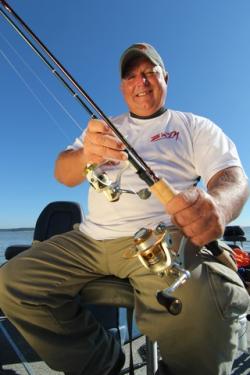
Rod and reel for casting for crappie

Rod and reel for casting for crappie

When it comes to crappie rods Taylor, Driscoll, and Harrison like using the B’n’M’ Poles Sam’s Super-Sensitive 7-Foot Crappie Rod (www.bnmpoles.com) or Buck’s Graphite Crappie Spinning rod. Both are lightweight graphite rods design just for casting live minnows or casting lures.

Spinning reels and rods make casting live minnows and lures so easy any angler can do it. Then it’s a matter of cleaning the fish and heating up the cooking oil.

How To Find Fish In Transition with Electronics

Finding Fish In Transition
from The Fishing Wire

How experts use Humminbird technologies to put the bead on fall and winter fish

Eufaula, AL – Typically, as fall arrives, many of us head for the tree stand or blind, turning our attention to birds and bucks. Yet, what’s happening on the water this time of the year can be equally as awesome as what’s happening in the field.
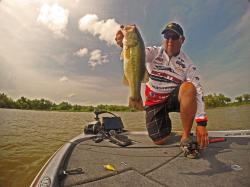
Electronics help catch bass

Electronics help catch bass

Vahrenberg verifies the presence of a kicker fish on the tree identified with 360 Imaging.

Here’s how a handful of fishing’s top experts find and pattern bass, walleyes and panfish during the fall and winter – and how you can do the same.

Open-Water Bass: Fall & Winter

Missouri-based tournament pro Doug Vahrenberg says his fall and winter bass game has never been better thanks to the trifecta of Humminbird’s LakeMaster mapping, Side Imaging and 360 Imaging.
“As the water cools and bass school up in the fall, they’ll begin to move from the main lake into creek arms. And you’ve got main lake fish on the flats adjacent to those creek arms. Both have one thing in common: they’re looking for lunch.”

Vahrenberg says it all comes down to surveying a lake quickly because fall bass can be here today, gone tomorrow. With two ONIX units at the dash – one set to full-screen Side Imaging, the other to Humminbird LakeMaster mapping – Vahrenberg is similarly on the prowl for baitfish and bass.

“I typically have my Side Imaging set to look 100 feet right and left. On a new lake I’ll increase that range to 130-150 feet until I find bait and ambush targets like trees, stumps, and submerged cover most anglers can’t see, especially in shallower stained water. Then I mark anything that looks like a good ambush site with a waypoint.”
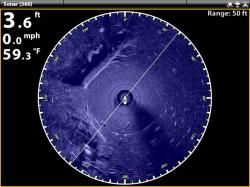
Hummingbird 360

Hummingbird 360

Humminbird 360 Imaging reveals the submerged tree in shallow, stained water that produced Vahrenberg’s bass (shown), only 25 feet from the boat.

He adds: “Seems like fall bass like flats close to a channel swing. They’ll move up from deeper water and push the bait into two-, three- or four feet of water and feed. With LakeMaster mapping you can find those spots where the channel swings in close to the bank. A lot of times your screen will be absolutely full of bait so I like to concentrate on those areas right before or after the giant wads of bait. Helps make the presence of your bait known.”

Once he’s located a channel swing, good cover, baitfish – even the bass themselves – Vahrenberg will jump from the console to the bow.

“As soon as I start pinging Bow 360 every waypoint will show up on my bow ONIX unit and I can motor right to ’em. Seems like if there’s a lot of cover, the fish tend to be isolated. Where there’s no cover, fish tend to group up in ‘wolf packs’. That’s where 360 Imaging really helps locating the stuff that you can’t see. The beauty is that it does all the work for you. You’re not controlling anything with your foot – all you have to do is look at the screen and think about where to cast next.”
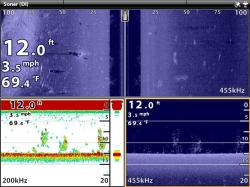
ONIX split-screen

ONIX split-screen

This ONIX split-screen reveals the presence of baitfish in Side Imaging, 2D Sonar and Down Imaging.

From fall through winter, Vahrenberg breaks down his presentations into two preferred categories.

“I always have one stick rigged up with a creature or jig and craw combo to flip the isolated fish on cover. Those fish will position right behind the timber, waiting for lunch to swim by. On lakes with less cover I’m fishing fast search baits to connect with the wolf packs – square bills, spinnerbaits, buzzbaits, lipless cranks – and searching out aggression bites. A shad pattern is always good but if there’s an overabundance of forage, I’ll switch over to a bluegill pattern, which is often just different enough to get bit. Look at it this way, if you’re eating a chicken breast every day and somebody offers you pizza …”

During winter, Vahrenberg reverses his fall routine and starts at the back of creek arms, moving outward to the first or second channel swing – or from the edge of the ice back to the main lake. “Even more so in the winter, bass will associate to the channel swings – and deeper water – but look along the edges. Again, LakeMaster mapping and the imaging technologies can really help you find the right stuff.”

Pre-Fishing For Early Ice: Walleyes & Perch

In northern Minnesota, the open water season is typically over by Thanksgiving. Yet, by the time the turkey and cranberry are being passed around the table, ice fishing guide/tournament Brian “Bro” Brosdahl has much of his winter ice fishing strategy already mapped. Many years, he’s already fishing on hardwater by turkey day.

“Sure, I’ll drop waypoints on structures in the fall but what I really do is fast-forward my thinking to winter, knowing that walleyes and jumbo perch will associate to shoreline points, saddles, humps, and weed bed edges on flats during early ice,” says Brosdahl.

Like Vahrenberg’s Missouri bass, Brosdahl says the biggest reason early-ice fish associate to these areas – especially on larger bodies of water like Minnesota’s Mille Lacs, Winnibigoshish and Leech – is the presence of baitfish. “Walleyes and perch both gorge on shiners, although the bigger walleyes seem to prefer whitefish.”

Brosdahl says Humminbird Lakemaster mapping greatly reduces the time it takes him to “pre-fish” a lake in the fall for ice fishing in winter.

Yellow Perch

Yellow Perch

Brosdahl and the big jumbo perch pay-off of scouting with Humminbird LakeMaster and Side Imaging technologies. Photo by Bill Lindner.

“But you can’t just motor around in the fall, mark bait and fish and drop waypoints. Most of the fall fish will have moved by first-ice. So, what I do is highlight depths with Lakemaster’s Depth Highlight feature – typically somewhere between 12 and 14 feet on bigger lakes – and then start dropping waypoints on those areas that will be their next move after fall.”

“You still have to look for inside turns, saddles and especially those steep breaks for walleyes. But remember: If there are walleyes in the area, they’ll push the perch up onto adjacent flats and the gradual breaks.”

Brosdahl was one walleye fishing’s earliest adopters of Side Imaging. “Same time as I’m watching my LakeMaster map, I’m watching Side Imaging for hard- and soft bottom edges. Both walleyes and perch will ride those edges all winter long. With Side Imaging these spots are unmistakable. Plus, as more of your ‘A list’ spots like rock piles and sunken islands get winter fishing traffic, I find myself fishing hard-to-soft bottom transitions in places easily overlooked.”

Once a surveyor for LakeMaster himself, Brosdahl says mapping waters with Humminbird’s new AutoChart Pro software has been a lot of fun. “Of course, this time around I don’t have to share my findings with anyone!”

“Kind of cool that I can go to a lake that doesn’t have HD one-foot contours and really dial in on spots for winter. Plus, AutoChart Pro gives me bottom hardness mapping so I those hard-to-soft spots really jump out. And there are some tiny lakes that have never been mapped. That’s where AutoChart really shines.”

One pass of Humminbird 360 reveals more than 10 manmade crappie cribs in a single pass. Range set to 120 feet in every direction.

manmade crappie cribs

manmade crappie cribs


He adds: “Another thing: Internet connectivity – even phone reception – can be pretty spotty in the areas I fish. Pretty cool that you can create the map on a PC without having to connect to the web. Plus, I know my data’s kept private.”

Tournament Talk: Winter Panfish

Currently, Wisconsin-based Kevin Fassbind and Nick Smyers are in second place as they prepare to fish the NAIFC 2014 Series Ice Fishing Championship on Minnesota’s Mille Lacs Lake, December 20, 2014.

A big part of their ongoing strategy is open-water scouting tournament grounds, like Mille Lacs’ Isle and Waukon bays.

“We’ve found Humminbird Side Imaging helps us identify the best weeds and hard-bottom areas. We’ll idle back and forth through a bay, looking 120 feet off each side of the boat. When we see holes in weed beds, inside turns and good bottom, we simply drop waypoints for winter. The way the system works is pretty easy – just pop the SD card out of the Humminbird 999 on the boat and drop it into the Humminbird 688 ice combo. Then it’s all right there,” says Fassbind.

Beyond marking waypoints on open-water, the duo has also experimented with Side Imaging on the ice. Using a pole-mounted Side Imaging transducer spun manually around in a hole in the ice, Fassbind and Smyers have had some success using the technology in a way it wasn’t intended.

“When we were fishing the NAIFC event on Lake Maxinkuckee, Indiana, we found a 20′ x 20′ patch of weeds with some logs, and Kevin pointed me in the direction and told me to start drilling. Boom, drilled one hole and I was on it,” says Smyers. “But it was difficult to get the image we wanted. Yet, we could see how this kind of technology could give us a huge on-ice advantage for locating manmade structures like cribs, Christmas tree piles, even fish.”

Along those lines, the duo is planning on implementing Humminbird Bow 360 into their tournament arsenal this year.

“What we were trying to do with Side Imaging is something that 360 Imaging already does better. With a little bit of rigging for ice, I really think it’s going to help us locate structure and fish even faster, which could be huge for main-basin crappies and deep-water perch. Punch a waypoint on fish and then go drill it. Instead of drilling hundreds of holes, we’ll be drilling a precise few. Not sure how much grid scouting we’ll be doing any more,” says Smyers.

Kevin Fassbind

Kevin Fassbind

Competitive ice angler Kevin Fassbind and teammate Nick Smyers use a combination of open-water and on-ice scouting with Humminbird technologies to stay on top of the leaderboard.

No matter where in the country you fish, the take-home message is clear: put in some time scouting with today’s technologies and you too can increase your odds for stellar fall and winter fishing.

For more information visit humminbird.com, contact Humminbird, 678 Humminbird Lane, Eufaula, AL 36027, or call 800-633-1468.

About Johnson Outdoors Marine Electronics, Inc.
Johnson Outdoors Marine Electronics, Inc. is a wholly owned subsidiary of Johnson Outdoors and consists of the Humminbird®, Minn Kota® and Cannon® brands. Humminbird® is a leading global innovator and manufacturer of marine electronics products including fishfinders, multifunction displays, autopilots, ice flashers, and premium cartography products. Minn Kota® is the world’s leading manufacturer of electric trolling motors, as well as offers a complete line of shallow water anchors, battery chargers and marine accessories. Cannon® is the leader in controlled-depth fishing and includes a full line of downrigger products and accessories.
Will A Spinnerbait Wire Break If I Use It Too Long?

I almost lost the only bass I hooked in my last club tournament when the spinnerbait I was using broke. At weigh-in, Blake Thompson told a sad tale of losing a huge bass – at least 8 pounds – when it broke his line. All fishermen have bad luck like that at times. However, there are things you can do to lower your chances of bad luck.

On Saturday before the tournament two weeks ago, I fished with Jim Stutts and his 16 year old son Jay. I met Jim when we fished together in a tournament in 1986. The first place we stopped Jim asked if I remembered the big fish he lost in that tournament in a treetop when it broke his line. He said I taught him a lesson he would never forget – re-tie your line if you get hung up.

He reminded me I had re-tied my line as we idled across the river in that tournament. We had been dragging spinnerbaits over stumps and getting hung up a lot. He didn’t take the time to re-tie his and broke off the big fish right after we started casting again. He said he always re-tied after getting hung up now, and reminded Jay to do so throughout the day.

Blake had been fishing rocks in the tournament two weeks ago, bumping a spinnerbait on them. He did not re-tie his 12 pound test line, although bumping rocks is the easiest way I know to damage your line. He hooked the big fish, it jumped and then broke off.

I learned my lesson the hard way also. Jim Berry and I were fishing High Falls soon after I moved to Griffin in the early 1970’s. I had not had a strike all day, and had gotten too lazy to re-tie my line. I cast into a treetop and a got my first strike. A five pound bass jumped when I set the hook and then ran under the boat. It broke my line. When I checked the broken end, it was very frayed. You can feel the rough line where it is messed up by rocks, limbs, docks and even fishes’ teeth.

When fishing, check your line and re-tie it regularly. If it feels rough, re-tie. Even if it doesn’t feel rough, I often hold the hook and jerk it much harder than a fish could, just to see if it will break. Sometimes the knot is weakened and you can’t tell until too late unless you stress it like a big fish might.

The lighter your line, the more often you should check it and tie a new knot. Heavy line holds up better but still needs attention. When fishing a Carolina rig with three knots, check all three often. Don’t lose the fish of a lifetime when you have that one chance because you didn’t take the time to tie a knot.

With spinnerbaits, you can not tell when they are going to break. If fishing for fun, I might take a chance on using a $5.00 spinnerbait over and over. In a tournament, when a bass could be worth hundreds of dollars, I will retire a spinnerbait after catching no more than three fish on it. It is just not worth taking a chance that the wire has become weak and might break.Will

Can I Lose A Bass By Changing the Angle I Am Fighting It?

The fish I lost in the tournament two weeks ago taught me some more lessons about getting fish in the boat. The one bass I hooked in the Oconee tournament hit a Shadrap in a brush pile. When I set the hook it came to the top and I could see the hook was just barely in its mouth.

The fish was running to my right, around the front of the boat. Rather then try to turn it, I told Jim I would let it go around the boat and bring it to the other side. I also told him to net it quick or it would be gone.

The reason I did not try to make the fish turn and come to the near side of the boat is past experience. When a fish is hooked on a crankbait, trying to make them turn often pulls the hooks out. I think the plug acts as a lever, and when the angle changes, the hook can no longer hold.

I have lost several fish like that. The biggest was a huge bass at Jackson. It came to the top and, when I tried to pull it toward the boat, it just came off. It floated there for what seemed like several seconds before sinking out of sight. I guessed it weighed over 10 pounds.

Linda lost a monster bass at Clark’s Hill many years ago in the same way. She fought it till it was tired and on top. Just like the one I lost, when it turned on its side, the angle of the hook changed and it pulled off. There is nothing you can do in a case like that.

At Oconee, my bass went under the boat after coming around the front. When I tried to pull it to the surface for Jim to net, I pulled the hook out of its mouth. Again, I was pulling in the opposite direction from the way it was hooked. There was no way Jim could have netted it, although I fussed at him for not doing so.

A few minutes later, Jim hooked a fish. It was running to the right also, and when he tried to turn it, it pulled off. We never saw the fish, and neither of us had a fish to weigh in that day. Some days, if you don’t have bad luck you don’t have any luck at all.

If you hook a good fish, keep in mind hooks often pull out if you reverse the pull from the way it was hooked. Often there is nothing you can do about it but if you can lead the fish around in a circle it might help you land it.

How To Make A New England Style Fish Stew

I tried a new fish stew recipe last weekend that is mighty good on these cold, rainy fall days. If you like New England style chowder, you will like this fish stew.

Brown a couple of strips of bacon in a pot. Remove the bacon and cook a large chopped onion in the grease until clear. Add three cups of chopped potatoes and the crumbled up bacon, cover with water and cook for about 15 minutes. Add two pounds of bass or crappie filets cut into chunks, half a stick of butter, salt and pepper and cook until the fish and potatoes are done. Add 16 ounces of evaporated milk and stir until hot.

Like all fish and stew, this is even better fixed ahead and warmed back up. Add a chopped stick of celery and a carrot for more flavor. Since I am allergic to milk, I used rice milk rather than evaporated milk. It is not as rich and good, but I like the added sweetness and rice flavor. You can use frozen hash browns for the chopped potatoes.

If you catch some hybrids, they will be too strong for this mild chowder. Bass or crappie are much better. Strong oily fish like hybrids are better in tomato based stews.

Can I Catch Bass On An Ice Fishing Jig In the Summer?

Ice-Fishing Bait Helps Palaniuk To Top-10 Finish In Bassmaster Tourney
from The Fishing Wire

Brandon Palaniuk

Brandon Palaniuk

After grabbing an early lead in a Bassmaster tournament last month, Brandon Palaniuk told the media he was keeping details of his tackle and tactics “locked down for now.” It’s time to bust out the key and set his secret free. In the heat of the summer he caught ’em on an ice-fishing bait – a Rapala Jigging Rap®.

“It’s a little trick up my sleeve that I’ve kept secret for a long time,” says Palaniuk, the only Bassmaster Elite Series pro from Idaho. “Before I made the Elites, I had thrown them a little at home. I’ve caught open-water fish on them all the way down to 70, 80 feet.”

When fished through the ice as they were designed for, Jigging Raps work best with a vertical pump-and-swim action. A successful open-water presentation, however, requires aggressive rod snaps throughout a horizontal retrieve.

“When you snap the rod, it will dart a foot or two off to the right, and then it falls super fast,” Palaniuk explains. “And then you snap it again and it might dart two feet back over to the left – or forwards, or backwards. It’s a constant change of direction.”

After weighing a 20-pound-plus five-fish limit to lead the first day of the Bassmaster Elite Series tournament on New York’s Lake Cayuga in late August, Palaniuk told Bassmaster.com he was fishing a pattern he had all to himself. It’s likely those Empire State bass hadn’t seen anything like a Jigging Rap before – at least not in the summer.

Lead weighted and balanced to perfection, Jigging Raps inimitably simulate the erratic characteristics of a wounded baitfish. “The big thing is how erratic it is,” Palaniuk says. “For fish that are in a negative, inactive mood, it triggers a feeding response.”

The Jigging Rap’s unmistakable minnow profile features single reversed hooks on the nose and rear – so regardless of how a fish attacks, it’s running smack-dab into a hook. A center treble hook – hung from a belly eyelet – further increases your hook-up ratio.

Fishing much deeper than most other competitors on Cayuga, Palaniuk saw only one other angler during the tournament. Targeting smallmouth, he ended up catching both brown and green bass off of two small rock piles in about 25 feet of water. A shell bed extended from the rock pile area down to about 40 feet. “The fish would stay anywhere from that 25-foot to that 40-foot zone,” he says.

Palaniuk found fish in those spots in the two-and-a-half days of practice before the four-day tournament began. Despite being able to see them clearly on his depthfinder, however, he couldn’t get them to bite at first.

“There were schools of these fish, so I’d drop on them with a drop shot and they’d follow it down,” he recalls. “But I wouldn’t be able to get them to eat.”

But on the last day of practice, inspiration struck.

“I pulled out the Jigging Rap to try to get a reaction strike,” he says. “The first drop with it, I had one eat it.”

It was a No. 7 size Jigging Rap in the Glow color pattern – white with a chartreuse head. He threw it on a 7-foot, medium-action spinning rod spooled up with 8-pound-test braided line attached to an 8-foot, 8-pound-test fluorocarbon leader.

“That first drop of the Jigging Rap, a couple followed it down, and the first few snaps of the rod, I got one to eat it,” Palaniuk says. “So then I kind of got excited. I was like, ‘Man, I’ve got something figured out that they’re going to eat!”

After dropping the Jigging Rap a few more times and shaking off a few more bites, he determined he’d found a school of 4-pounders.

“So, I just always had one tied up and on the deck throughout the tournament,” he says. “And when I would see fish on my electronics I would drop on them. If there were two or more fish, I’d drop on them like that and see if I could get bit.”

Ultimately, the Jigging Rap bite did not yield enough big fish for Palaniuk to win the tournament – he ended up placing eighth – but it did account for several of the fish he weighed and helped clue him into a couple other ways to get bites. Based on the way bass had been biting the Jigging Rap in practice, Palaniuk decided on the first day of the tournament to stroke a 1-ounce Terminator Football Jig, rather than crawl it across the bottom, a more traditional presentation. That decision led to a 20-pound, 1-ounce limit and the Day 1 lead.

“The reason I started stroking it was because of the fact that I got on the Jigging Rap bite,” he explains. “I just started ripping it off the bottom, like you would a Jigging Rap, and that’s pretty much how I caught 20 pounds pretty quick.”

Most of the bass Palaniuk caught on the Terminator Football Jig hit on the fall immediately after a vertical stroke. “You’d rip it up and I think you’d catch their attention, and they’d follow it up, and then instantly, if you’d let off at all, they ate it,” Palaniuk explains. “It’s almost like you’re fishing a spoon. Once you rip it up off the bottom, they eat it as soon as it changes direction – starts to fall.”

Although many believed, going into the tournament, that shallow-grass largemouth would be the ticket to success on Cayuga, Palaniuk – true to form – opted to target deep-weedline smallies.

“I always like doing something different,” he explains. “I feel like that’s how you put yourself in contention to win and how you can separate yourself from everyone else – if you can find the quality fish doing something different, that not every else is doing. The reason I found those fish is because I was looking for smallmouth.”

As it turned out, however, he caught both smallmouth and largemouth from his deep spots. Brown and green bass were “pretty evenly mixed in the school,” he says.